3D Print Your Own Keycaps
Let’s say you have some very specific requirements for your mechanical keyboard:
-
Gotta have the RGB bling
-
Dvorak layout (because you’re a nerd)
-
Also JIS layout (because cyberpunk)
Turns out you can’t buy that. But if you have a 3D printer, it’s time to get busy.
There’s a cool Project on GitHub for keycaps, which I have since forked for my own additions. This project uses OpenSCAD to define 3D solid models using a custom programming language. And you know who’s great with custom languages? Claude Code. So I told Claude to get busy and make what I wanted.
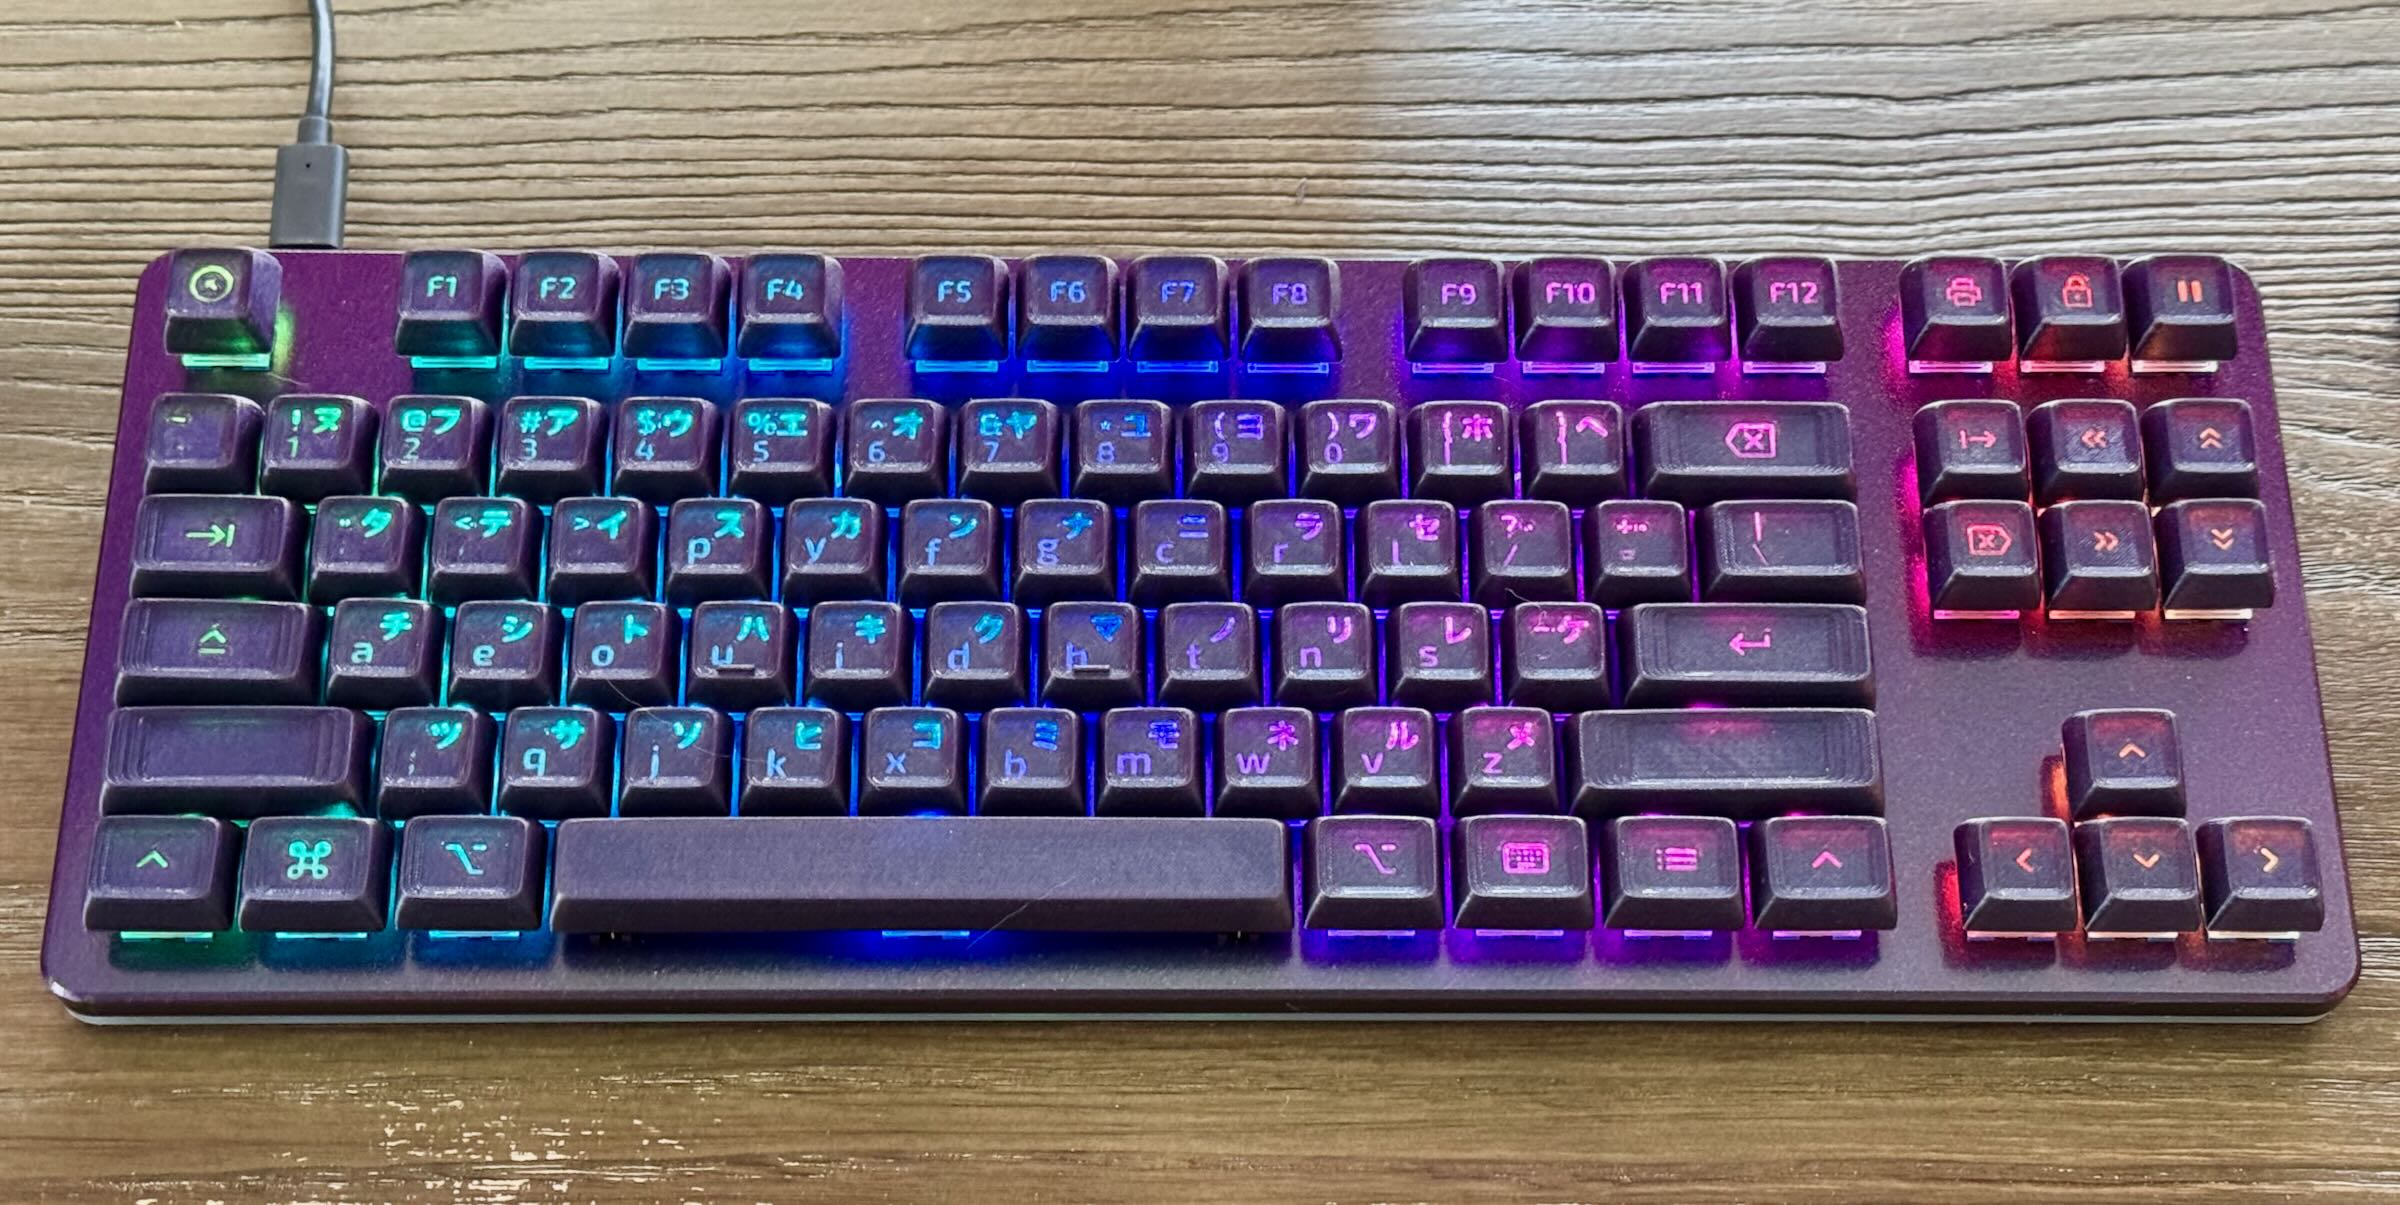
First order of business: keycaps that print well. On a FDM printer, gently curved slopes like the “dish” on an OEM keycap don’t print well. You really want the surface of the key to print flat. I found that a flat surface or a surface with a rectangular dish felt pretty good to type on. The Drop CTRL keyboard above has dished keycaps; the Kinesis shown later has no dish.
I opted for 0.25mm nozzles to get fine details like key legends to print well. You can also dial the extrusion width on a 0.4mm nozzle down to 0.3mm with reasonable results. Note that you need to drop the layer height down to 0.125mm or so, too. (That’s a topic for a separate post.) This limits filaments you can use–no carbon fiber, no glitter. Additives in the filament will jam on a 0.25mm nozzle. Trust me, I tried.
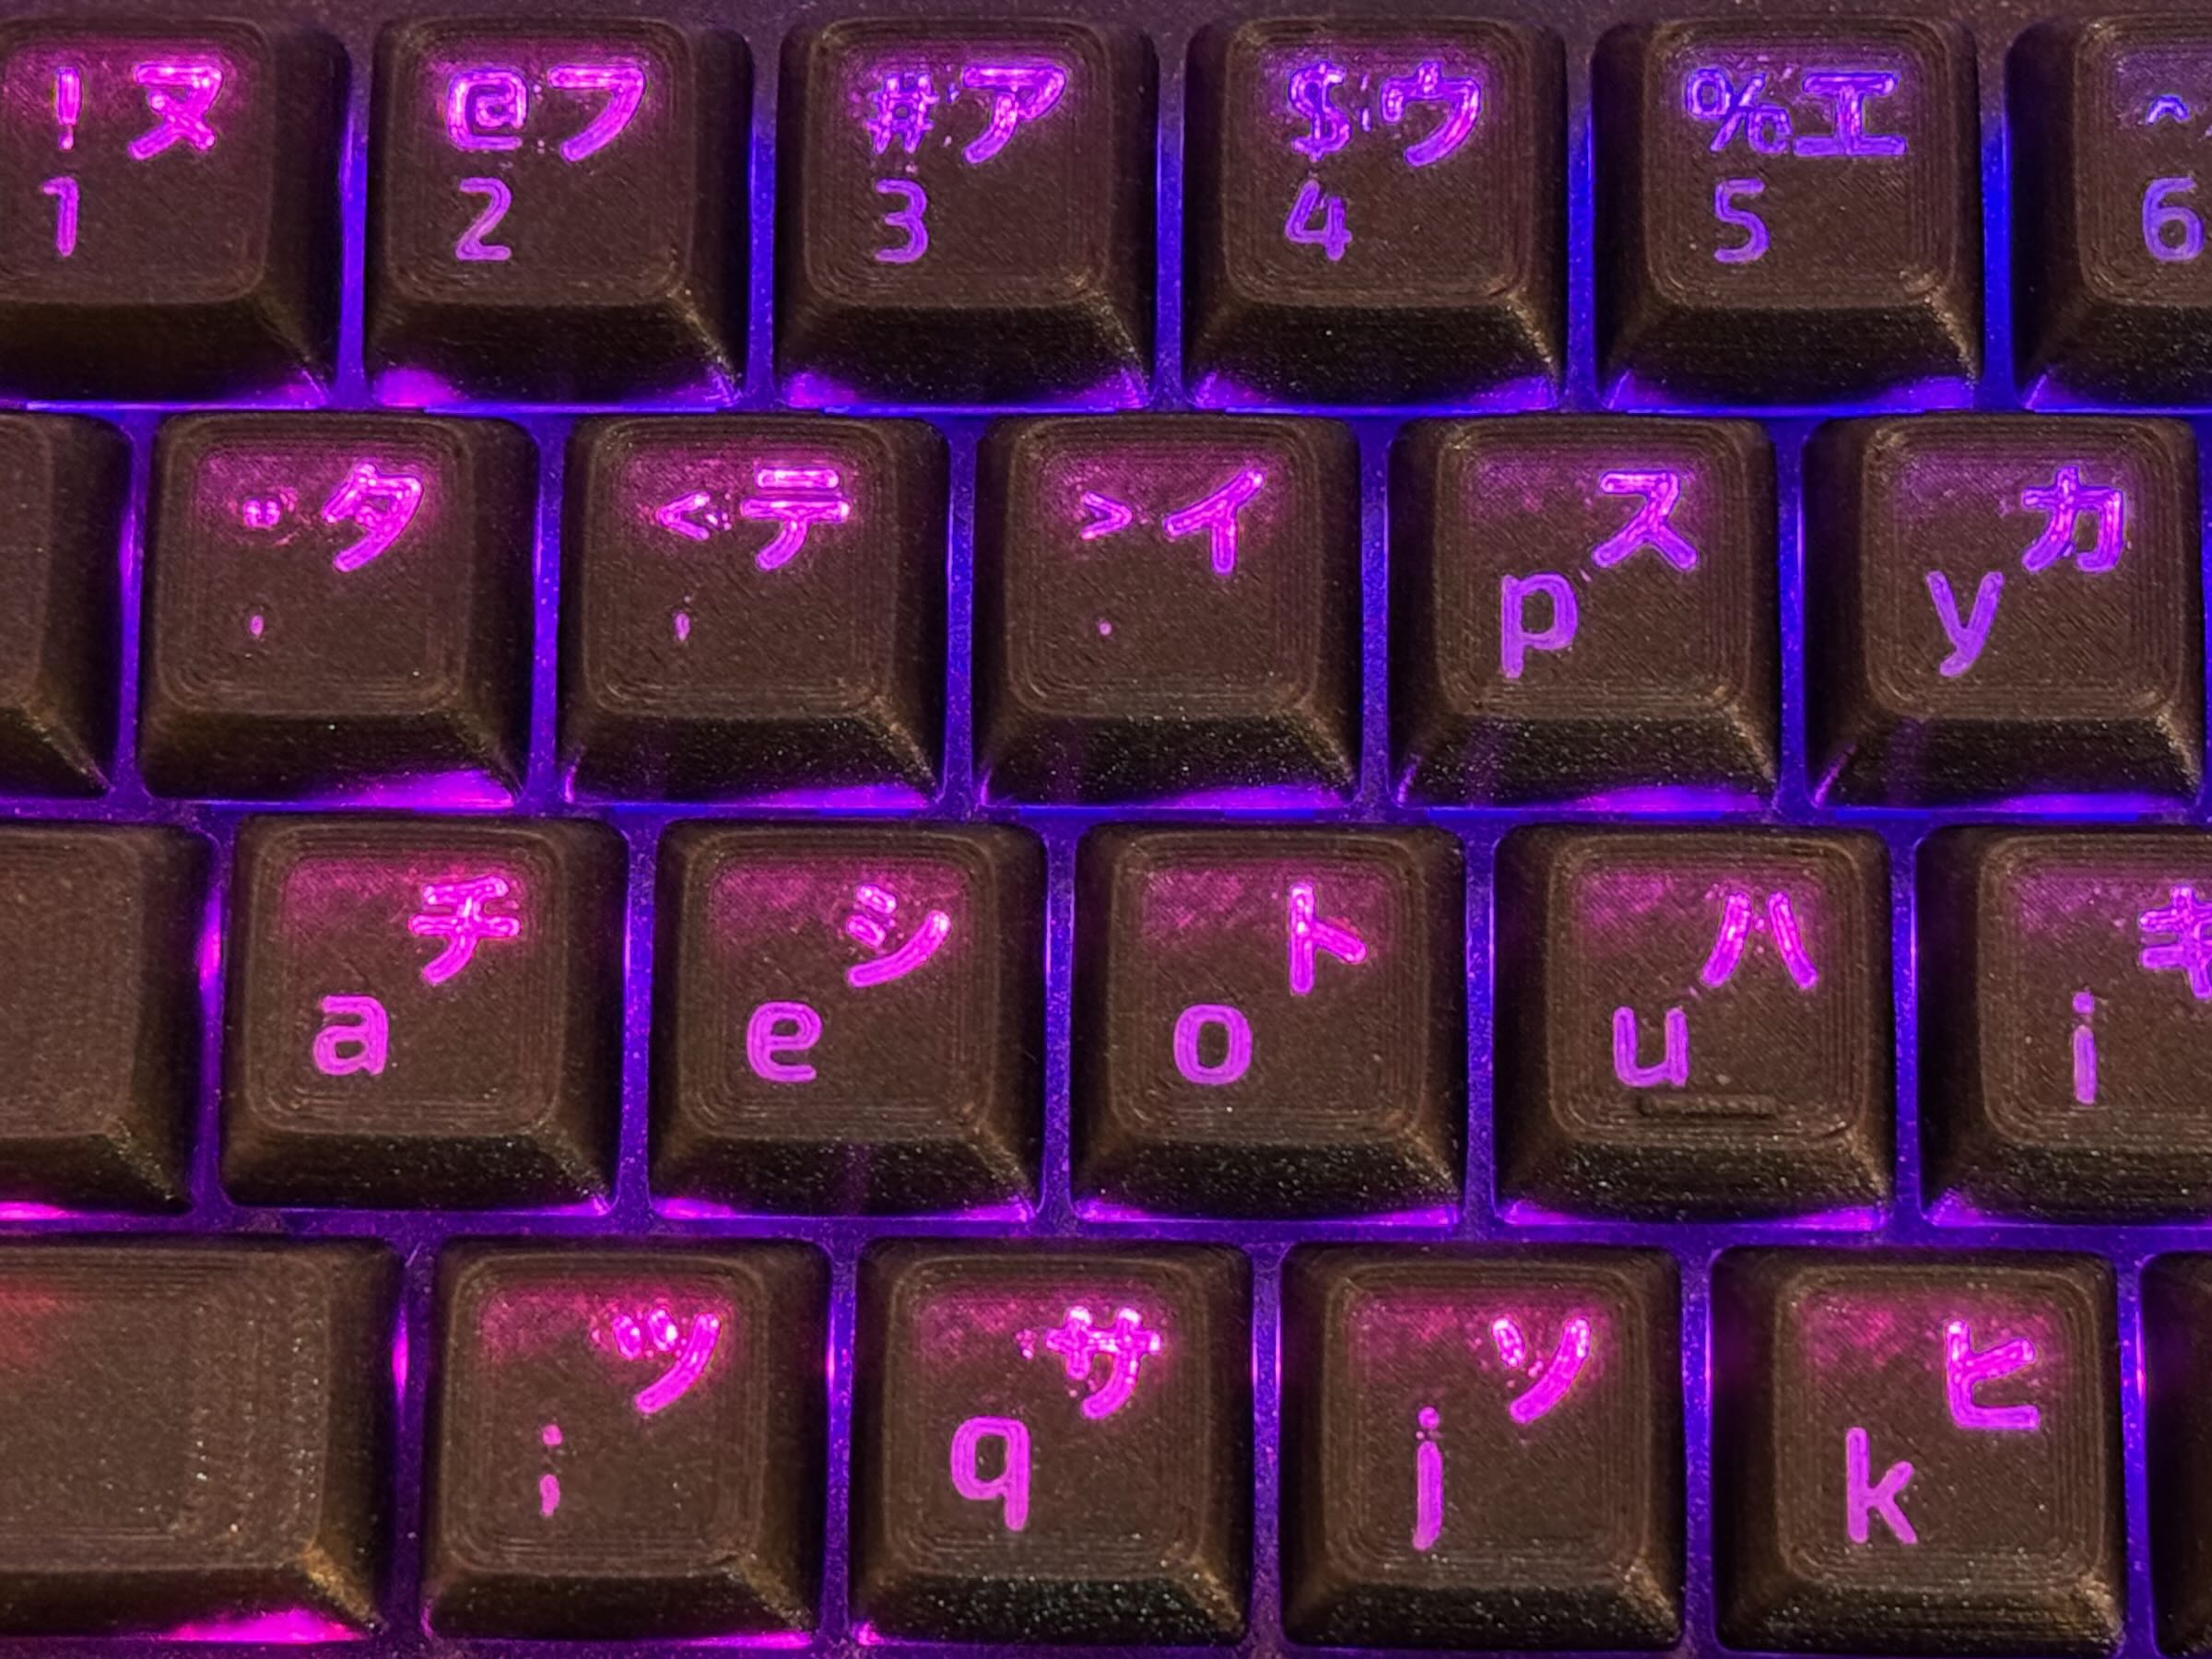
Next up: shine-through. The keycaps on the CTRL use translucent plastic with a shell of oqaque plastic, letting light through at the key legends. It turns out PLA does this reasonably well. PETG may also be a good fit.
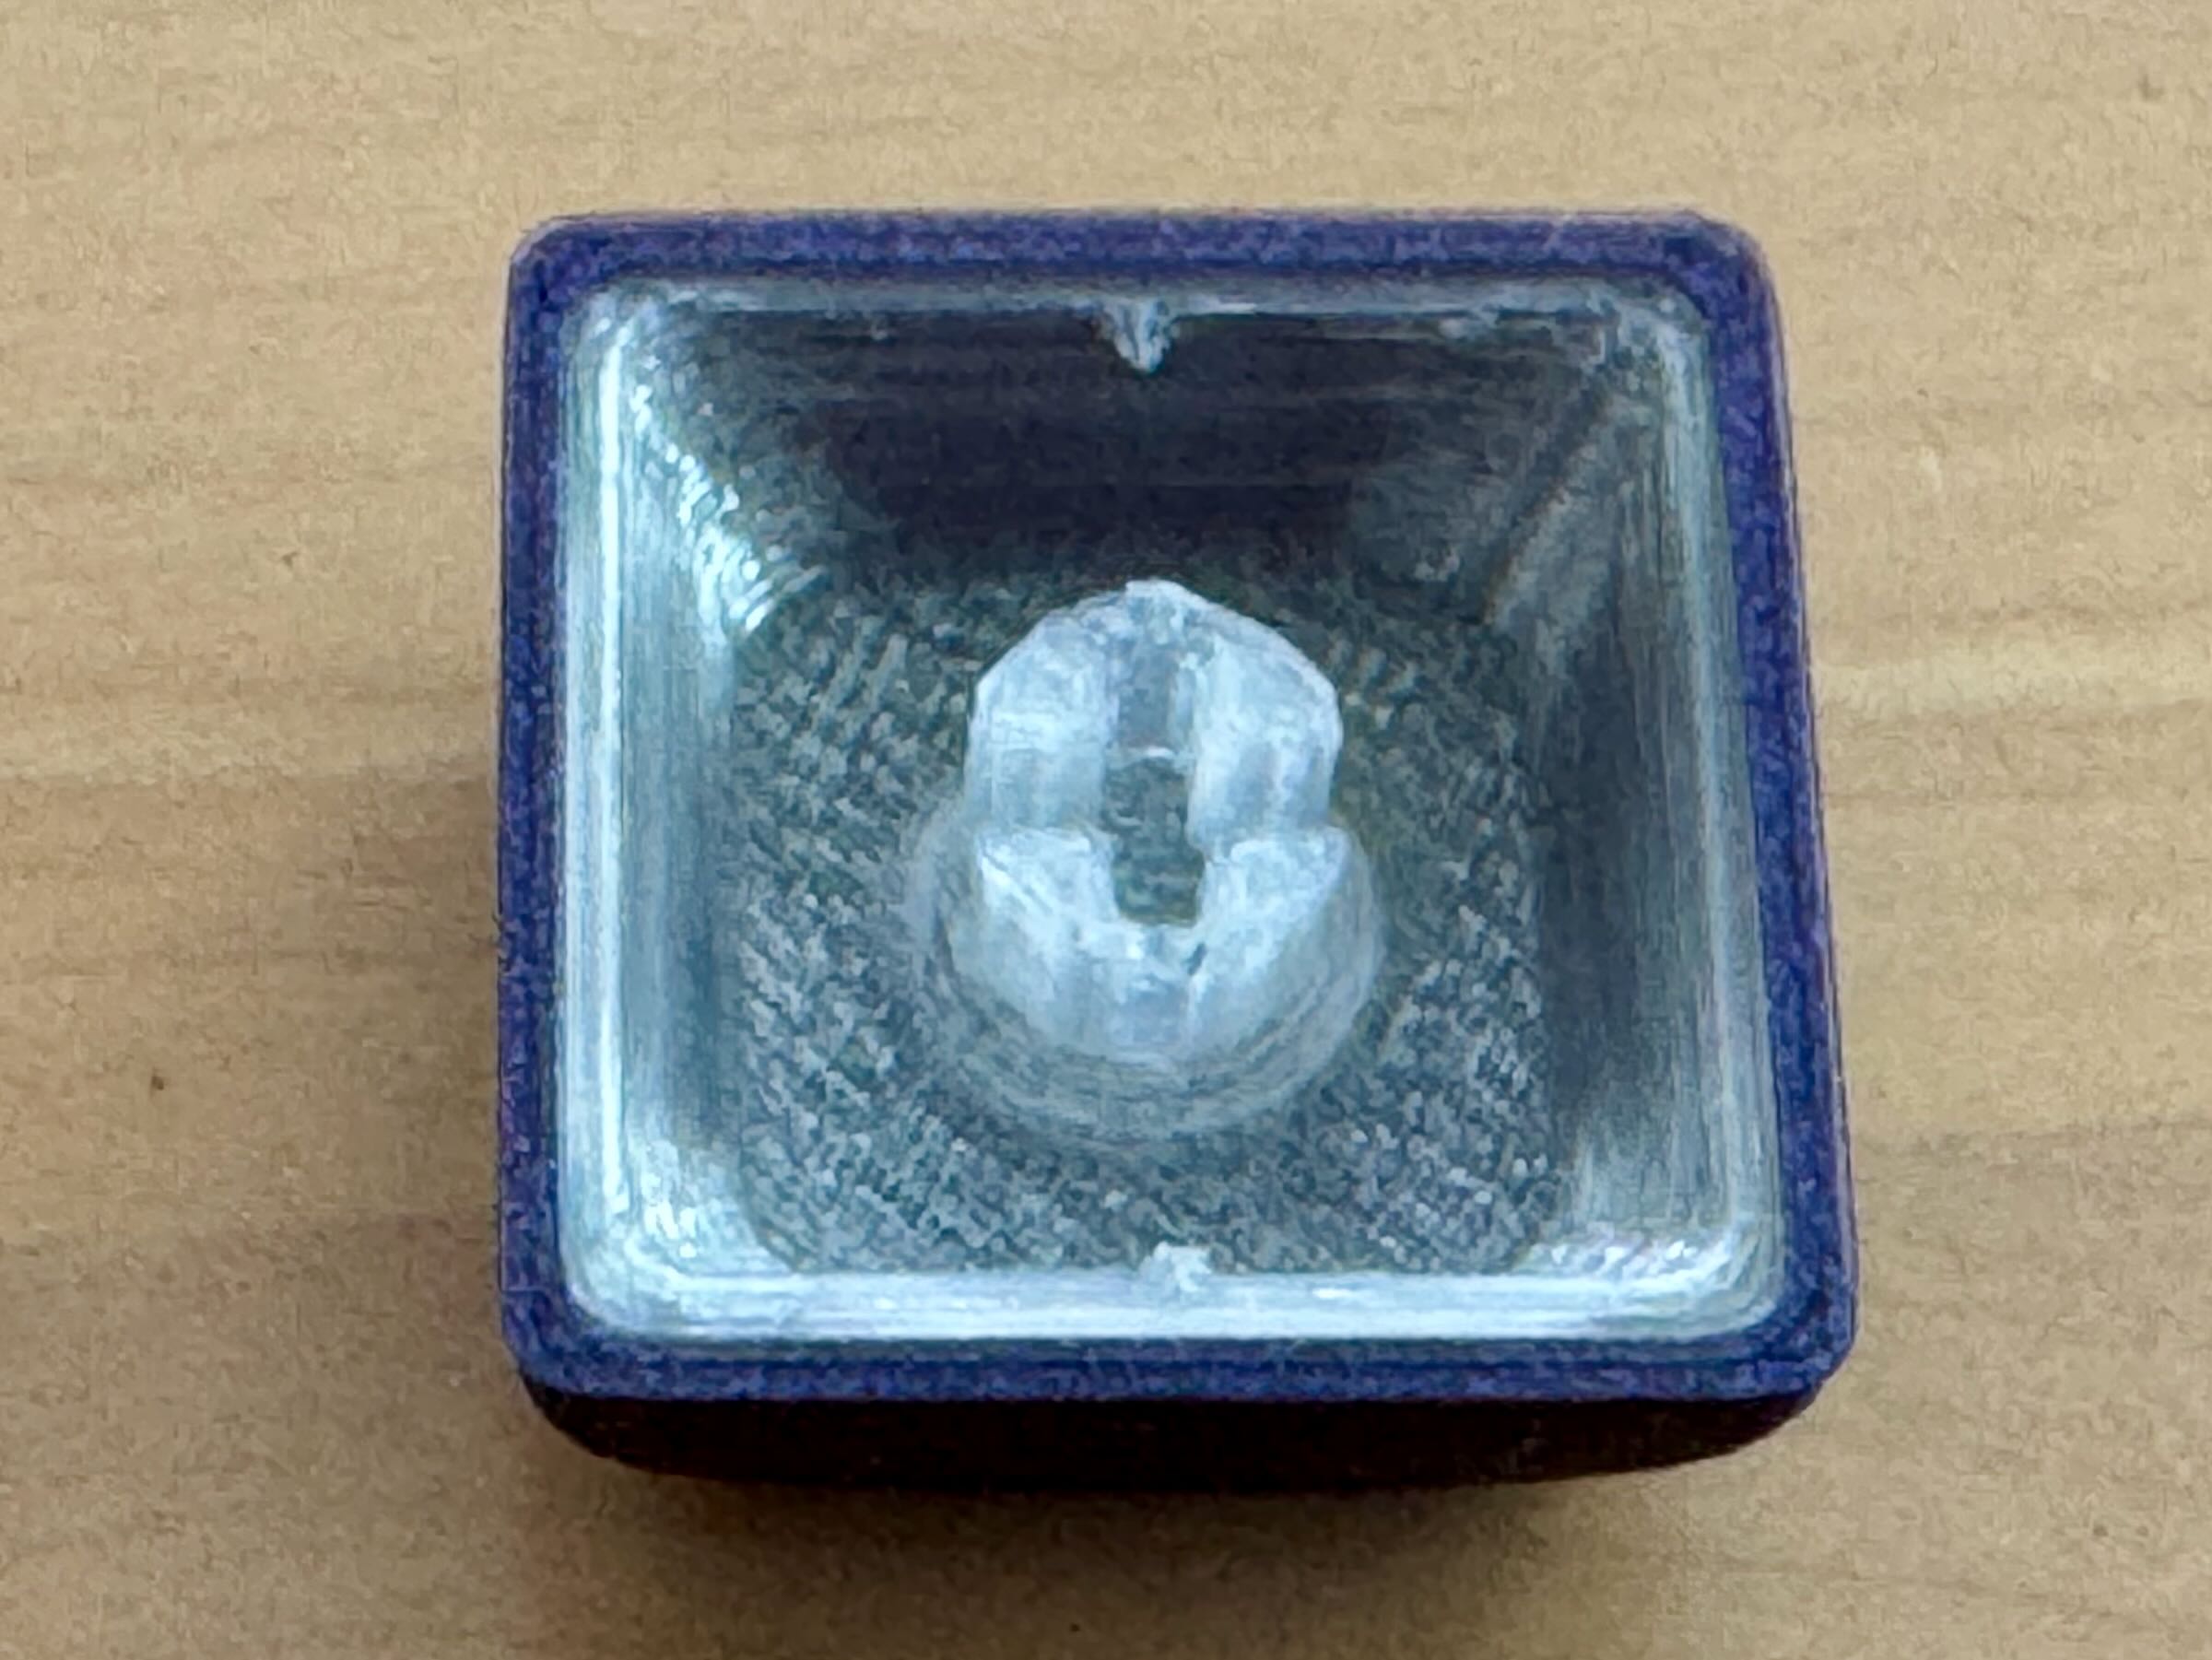
Here’s how it works: the new code renders two STLs, one for the inner
part of the keycap (including the stem) and one for the outer body.
See shine_through_key in src/key.scad of my fork. These get
combined in the slicer for multimaterial printing. For the photo
above, the inner part was printed in SUNLU “clear” and the outer in
Polymaker/Panchroma “starlight twilight.”
This actually worked reasonably well. The translucent part could stand to transmit a bit more light, and the opaque section could stand to block a bit more light, but they actually look pretty good in-person.
Next up: my Kinesis keyboard from earlier exploits didn’t actually need new keycaps, but it was going to get some anyway. For this one I wanted to keep it simple with white legends on a black base, but use a more demanding typeface inspired by old Apple keyboards. I tried putting dish on the 8 home keys and keeping the rest flat.
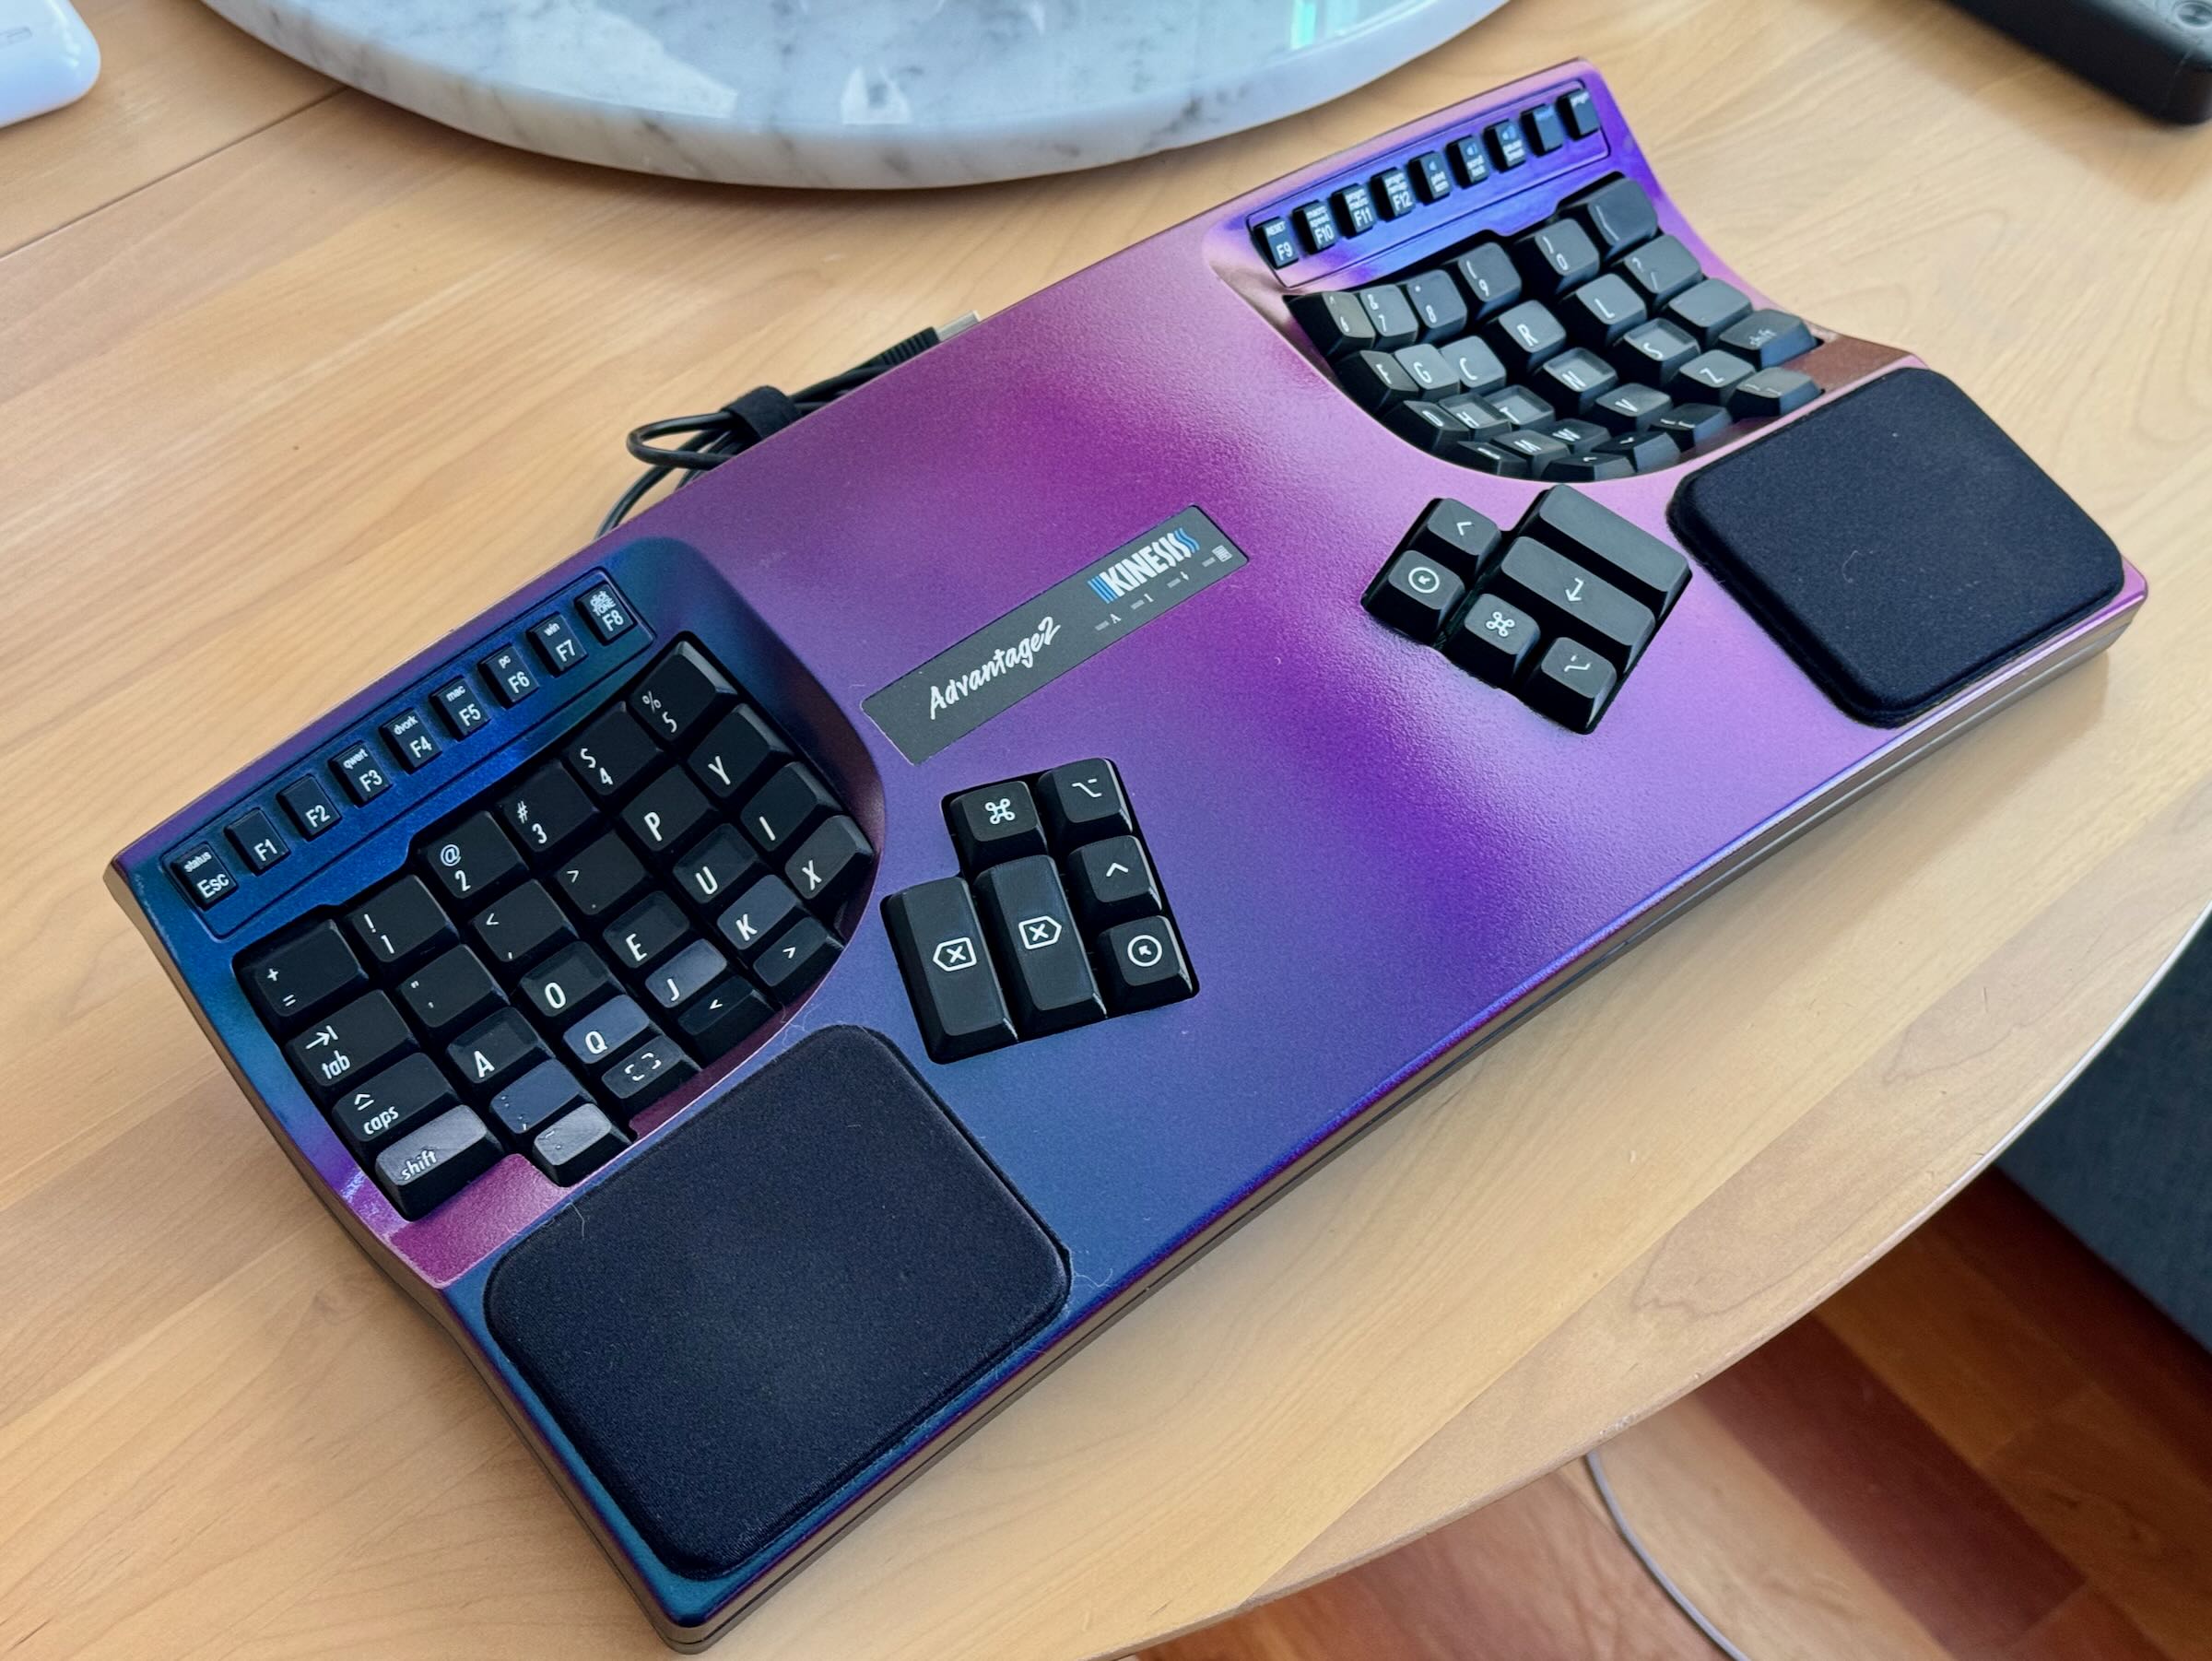
There were some challenges, however. First, stabilizers require rather small contact points with the keycap. The stabilizer profiles in the original KeyV2 library would break when I tried to trim their support sprues. It worked okay with rounded cherry stems, but you have to trim them up a bit afterwards.
Second challenge, if you have a sloping key profile, you can still get the top to print flat if you angle the whole key in the opposite direction–but it then requires supports. This code exists in my fork and it creates a very nice key surface, but also a bit of cleanup work after the print. I opted for a flat key profile instead.
I’ve been typing on these keyboards for about a month. The Drop CTRL could use a little more touch-up on the stabilizers (still a little friction there) and I’m not a huge fan of the dish on the key surfaces. The simpler Kinesis keycaps are perfect.